

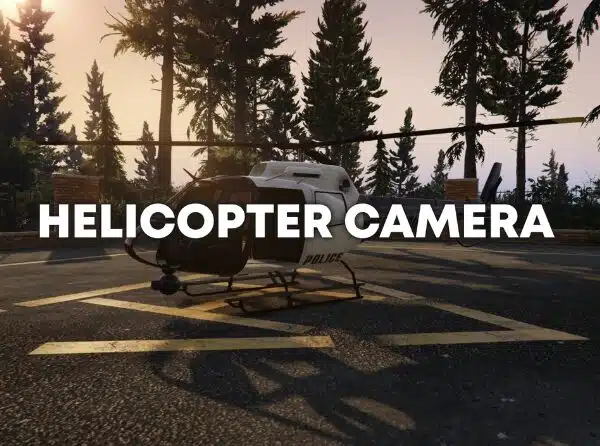
Helicopter Camera
$17.00 Ursprünglicher Preis war: $17.00$13.00Aktueller Preis ist: $13.00.
Enhance your helicopter gameplay with the Helicopter Camera resource! This standalone script adds a realistic helicopter camera system, complete with a modern, real-world-inspired UI. Features include:
- Toggleable camera with smooth movement
- Zoom functionality
- Target locking (vehicles, peds, ground)
- Adjustable Spotlight (brightness & radius)
- Vision Cycling (thermal/night vision)
- Marker Placement/Removal
- Rappel System
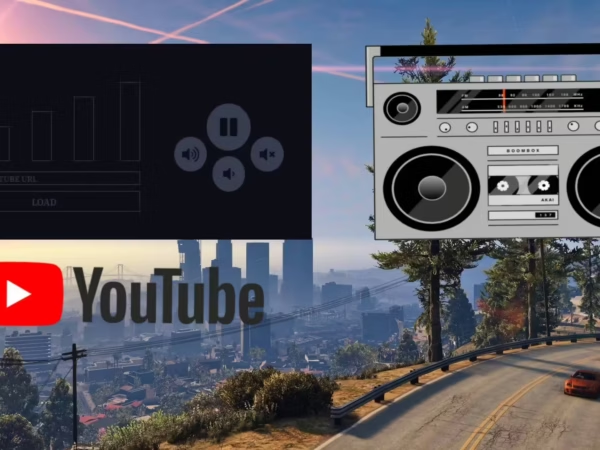
Keybinds are customizable via keymapping (default keybinds included). The script is highly configurable and open for editing. It also disables police scanners and flight music by default.
-
$ USD
-
€ EUR
-
£ GBP
-
$ AUD
-
R$ BRL
-
 Instant Download
-
Satisfaction Guarantee
-
100% Open Source
-
Works out-of-the-box
Config file:
Config = {}

Config.TimeFormat = 0 -- 0 = ZULU (UTC), 1 = In Game Time, 2 = OS TIME (Local Time)
Config.DateFormat = 1 -- 0 = MM/DD/YY, 1 = DD/MM/YY, 2 = YY/MM/DD, 3 = DD-Mon-YYYY

Config.PlaySounds = true
Config.PlayCameraMovementSounds = true -- If true, sounds will be played when you move the helicopter camera
Config.DisablePoliceScanner = true -- If true, disables the police radio/scanner/dispatch sounds.
Config.DisableFlightMusic = true -- If true, the ambiant flight music will be disabled.

Config.CameraTransition = true -- If true, the camera will ease when you enter/exit the camera
Config.CameraTransitionTime = 1000 -- The time the transition/ease will take.

Config.CameraTimecycle = false -- false or "string" ("Broken_camera_fuzz", "CAMERA_BW", "CAMERA_secuirity", "secret_camera" or any valid timecycle: https://wiki.rage.mp/index.php?title=Timecycle_Modifiers)
Config.CameraTimecycleStrength = 0.5 -- 0.0 to 1.0, the strngth of the camera timecycle, only used if Config.CameraTimecycle is set to a string.

Config.ShowLatitudeLongitude = false -- If set to true, it shows latitude/longitude, otherwise it shows the street and area
Config.TargetMaxReach = 424.0 -- The longest distance we can target an entity (424 is the regular culling dist for a player, you won't ever be able to practically reach this long anyway)

Config.ForceCameraLabel = false -- false or "Label"
Config.CanUseAnyHelicopter = false -- If true, any helicopter can be used, if false, only helicopters in the Config.Helicopters table are allowed.

Config.AllowCameraLock = true -- If true, the camera can lock onto the ground/targets
Config.InstantCameraLock = false -- If true, the camera will immediately lock on to the target instead of requiering a grace period
Config.AllowCameraLockOnGround = true -- If true, the camera can lock onto the ground/buildings etc.
Config.CameraLockBreakTicks = 3 -- The maximum amount of ticks the camera can lose visual of the point/person/vehicle before it breaks.
-- If true, when locking onto an entity it will lock to the center of it, if false the camera locks onto the part of the entity you were aiming at right before locking.
Config.LockOntoCenter = {
    Peds = true, -- It has a tendency to not work perfectly when this is false.
    Vehicles = false
}

Config.ShowLicensePlate = true -- (LPL)
Config.CheckLicensePlateAngle = true -- If true, it checks the angle between the helicopter camera and the plate. This reasults in player beeing unable to get a license plate read when the camera can't clearly see the plate.
Config.OnlyShowPlateIfLocked = false -- If true, the plate will only be showed if we have a lock on the vehicle.

Config.WhitelistedJobs = false -- If false, the script doesn't check for jobs. If you want to check for jobs add a table where the job is the key, and the value is the job level like so: Config.WhitelistedJobs = { ['police'] = 2, ['ambulance'] = 5 }
Config.ShowMessageIfWrongJob = true -- If true, it will display an error message of you attempt to enter the camer without the right job, if false no message, just won't allow you to enter

-- false = Anyone can use the camera (including the pilot), 1 = Any passanger (not pilot) can use the camera, 2 = Only rear passangers can use the camera
Config.PassengerOnly = false

Config.ShowPostalCodes = false -- Shows postals while in the camera (This is a little resource heavy)
Config.PostalResource = "nearest-postal" -- The resource the postal file is located in (resource must be loaded before helicam, and the files must be formated like nearest-postal)
Config.PostalFile = "new-postals.json" -- MUST be a JSON file! (Note: The file must be loaded inside the fxmanifest of Config.PostalResource for the helicam script to be able to read it)

-- Adds a audio sumbix while in a helicopter/plane (noise suppression) (NOTE: Get's applied to all helicopters/planes, not just the ones with a camera)
Config.UseSubmix = true
Config.NoSubmixInCamera = false -- Only applys if Config.UseSubmix is set to true, if true, this will stop the submix when you are using the camera

-- If true, players will be able to rappel from helicopters that support it.
Config.AllowRappeling = true

-- If the script should add chat suggestions for some of the chat commands.
Config.AddChatSuggestions = true

-- Spotlight
Config.AllowSpotlight = true
Config.MaxAmountOfSpotlights = false -- false or number, set's the maximum amount of spotlights that are allowed on the server at any given time (global limit)
Config.Spotlight = {
    Colour = { R = 255, G = 255, B = 255 }, -- The RGB colour values of the spotlight, you can for example make it slightly more blue like so: { R = 220, G = 220, B = 255 }
    MaxDistance = 600.0,                    -- The maximum distance the spotlight will glow
    DefaultBrightness = 5.0,                -- The defult brightness of the spotlight
    MinBrightness = 0.5,                    -- The minimum brightness of the spotlight
    MaxBrightness = 20.0,                   -- The maximum brightness of the spotlight
    BrightnessIncrements = 0.75,            -- How much to change the brightness of the spotlight when adjusting it
    Roundness = 2.0,                        -- The "roundness" of the spotlight
    DefaultRadius = 10.0,                   -- The defult radius/size of the spotlight
    MinRadius = 5.0,                        -- The minimum radius of the spotlight
    MaxRadius = 15.0,                       -- The maximum radius of the spotlight
    RadiusIncrements = 0.75,                -- How much to change the radius of the spotlight when adjusting it
    Falloff = 200.0,                        --
}

Config.HideMinimap = false
Config.ZoomBarOffset = 20 -- The offset in % from the bottom of the screen the zoom bar will be when the minimap is enabled. (If you have something on the top of your minimap then setting it to 25 usally works well)
Config.TargetBlip = {
    Display = true,
    Sprite = 390,
    Colour = 40
}

Config.AllowNightVision = true
Config.AllowNightVisionDuringDay = false -- If the night vision can be enabeld during the day or not.
Config.AllowThermal = true
Config.ThermalOptions = {
    MaxThickness = 1.0, -- 1.0 = Default GTA, can't see trough much at all. 20.0 = Able to see trough most thin walls, however won't be able to see trough the ground or multiple/thick walls.
    MinNoise = 0.0, -- The minimum amount of background noise
    MaxNoise = 0.1, -- The maximum amount of background noise
    FadeStart = 5000.0, -- How far away (meters) before the "background" fade starts
    FadeEnd = 6000.0 -- How far away (meters) before the "background" fade becomes solid
}

Config.AllowMarkers = true
Config.Marker = {
    MaxAmount = 9, -- Above 9 the number markers should be disabled.
    MaxDrawDistance = 1000.0, -- The furthest distance a marker will be drawn at.
    Circle = {
        Type = 23,
        Scale = 8.0,
        Colour = { R = 230, G = 50, B = 50, A = 200 } -- { R = 110, G = 160, B = 230, A = 200 }
    },
    Number = {
        Display = true, -- Set this to false if you want the max amount of markers the be above 9
        Scale = 6.0,
        Colour = { R = 230, G = 50, B = 50, A = 200 }
    },
    Blip = {
        Display = true, -- Whether to display marker blips
        Number = true, -- Whether to display the number on the blip or not (99 is cap.)
        Sprite = 57,
        Scale = 0.75,
        Colour = 1, -- Red
    }
}

Config.UseAnimProp = true -- If true, players will have a tablet in their hands while using the camera
Config.Tablet = {
    model = -1585232418, -- prop_cs_tablet
    anim = {
        dict = "amb@world_human_seat_wall_tablet@female@base",
        name = "base"
    },
    bone = 57005, -- SKEL_R_Hand
    offset = vector3(0.17, 0.10, -0.13),
    rotation = vector3(20.0, 180.0, 180.0)
}

Config.ShowInstructions = false -- If true, instructions will be showns while you are in the camera
-- Used this website to get the controls (~INPUT_5D25DCCD~ for example): http://tools.povers.fr/hashgenerator/
-- 0 = On the right, 3+ = on the left.
Config.InstructionButtons = {
    -- [0] = { control = "~INPUT_5D25DCCD~", label = "Adjust Spotlight Brightness (scroll +)" },
    -- [1] = { control = "~INPUT_F8C9FB3A~", label = "Adjust Spotlight Radius (scroll +)" },
    -- [2] = { control = "~INPUT_DB481F5~", label = "Lock Camera" }, -- This doesn't work for some reason...
    [0] = { control = "~INPUT_662F7BF5~", label = "Add/Remove Marker" },
    [1] = { control = "~INPUT_DB471A88~", label = "Cycle Vision" },
    [2] = { control = "~INPUT_51D50495~", label = "Spotlight" },
    [3] = { control = "~INPUT_5D25DCCD~", label = "Exit Camera" }
}

-- Speed Units:
-- KTS = Knots (nautical miles per hour)
-- MPH = Miles per hour
-- KMH = Kilometers per hour
-- MPS = Meters per second
-- FPS = Feet per second

-- Distance Units:
-- FT = Feet
-- M = Meters
-- MI = Miles
Config.Units = {
    Speed = "KMH", -- The speed of the helicopter                               (unit type: speed)
    Altitude = "M", -- The altitude of the helicopter                          (unit type: distance)
    TargetSpeed = "KMH", -- The speed of the target the camera is looking at    (unit type: speed)
    TargetElevation = "M", -- The elevation of where the camera is aming       (unit type: distance)
    TargetDistance = "M" -- The distance from the helicopter to the target      (unit type: distance)
}

Config.Camera = {
    MovementSpeed = {
        Keyboard = 3.0,
        Controller = 1.0
    },
    Zoom = {
        Max = 100.0,
        Min = 5.0,
        Speed = 5.0
    },
    RotationLimits = {
        Up = 25.0,
        Down = -89.5
    }
}

-- Docs: https://docs.fivem.net/docs/game-references/input-mapper-parameter-ids/ -- https://docs.fivem.net/docs/game-references/input-mapper-parameter-ids/keyboard/
Config.Keybinds = {
    ToggleCam = {
        Type = "KEYBOARD",
        Key = "E"
    },
    AttemptLock = {
        Type = "KEYBOARD",
        Key = "SPACE"
    },
    CycleVision = {
        Type = "MOUSE_BUTTON",
        Key = "MOUSE_RIGHT"
    },
    ToggleMarker = {
        Type = "MOUSE_BUTTON",
        Key = "MOUSE_MIDDLE"
    },
    Rappel = {
        Type = "KEYBOARD",
        Key = "X"
    },
    Spotlight = {
        Type = "KEYBOARD",
        Key = "G"
    },
    SpotlightBrightness = {
        Type = "KEYBOARD",
        Key = "LMENU"
    },
    SpotlightRadius = {
        Type = "KEYBOARD",
        Key = "LCONTROL"
    },
    Postals = {
        Type = "KEYBOARD",
        Key = ""
    }
}

Config.Localisation = {
    -- Notifications
    Notification = {
        JobNotWhitelisted = "You don't have the required job!",
        JobGrade = "Your job grade is to low!",
        NoCameraHeli = "This helicopter doesn't have a camera!",
        NoCameraPlane = "This plane doesn't have a camera!",
        IsPilot = "You can't use the camera while you are the pilot!",
        NotInRear = "You need to be in the rear of the helicopter to use the camera!",
        CameraInUse = "Someone else is already using the camera!",
        SpotlightInUse = "Someone else is already using the camera spotlight!",
        NoSpotlight = "This helicopter does not have a spotlight!",
        SpotlightGlobalLimit = "The global spotlight limit has been reached!",
        CannotRappelFromHeli = "This helicopter does not support rappeling!",
        CannotRappelFromSeat = "You cannot rappel from this seat!",
        ToHighToRappel = "The helicopter is to far up to rappel!",
        ConfirmRappel = "Are you sure you want to rappel? (Press again to confirm)",
        Rappeling = "Rappeling!"
    },
    -- Blip Names
    Blip = {
        Target = "Helicam Target",
        Marker = "Helicam Marker"
    },
    -- Keybinding Descriptions
    KeyMapping = {
        ToggleCam = "Helicam - Toggle Camera",
        AttemptLock = "Helicam - Attempt Lock",
        CycleVision = "Helicam - Cycle Vision",
        ToggleMarker = "Helicam - Add/Remove Markers",
        Rappel = "Helicam - Rappel From Helicopter",
        Spotlight = "Helicam - Toggle Spotlight",
        SpotlightBrightness = "Helicam - (+ scroll) Adjust Spotlight Brightness",
        SpotlightRadius = "Helicam - (+ scroll) Adjust Spotlight Radius",
        Postals = "Helicam - Toggle Postals"
    },
    ChatSuggestions = {
        ToggleCamera = "Enter/Exit the helicopter camera",
        Rappel = "Rappel from the helicopter"
    }
}

-- Nightvision/Thermal/Spotlight/PassengerOnly can be manually enabled/disabled for each model by adding one or more of following varabels under the model.
-- nightvision = false / true
-- thermalvision = false / true
-- spotlight = false / true
-- passengerOnly = false / 1 / 2 (see Config.PassengerOnly)
Config.Helicopters = {
    -- Default (if there is any missing data it will draw it's options from here)
    default = {
        offset = vector3(0.0, 0.0, -1.0),
        -- nightvision = true,   -- These are only needed/used if Config.AllowNightVision or Config.AllowThermal is set to false
        -- thermalvision = true, -- You can add these to each and every model, adding these and setting them to false disables the vision even if Config.AllowThermal etc. is set to true
        -- spotlight = true,     -- Allows yo overwrite Config.AllowSpotlight on a helicopter to helicopter basis.
        -- passengerOnly = false,
        labels = {
            [0] = "FLIR SYSTEMS"
        }
    },
    -- Police Maverick (polmav)
    [353883353] = {
        offset = vector3(0.0, 2.65, -1.0),
        labels = { -- Liveries
            [0] = "LOS SANTOS POLICE DEPARTMENT", -- 0 is default
            [1] = "AIR AMBULANCE"
        }
    },
    -- Maverick (maverick)
    [-1660661558] = {
        offset = vector3(0.0, 3.45, -0.65)
    },
    -- Buzzard Attack Chopper (buzzard)
    [788747387] = {
        offset = vector3(0.0, 2.15, -0.35)
    },
    -- Buzzard (buzzard2)
    [745926877] = {
        offset = vector3(0.0, 2.15, -0.35)
    },
    -- Frogger (frogger)
    [744705981] = {
        offset = vector3(-1.0, 3.02, -1.1)
    },
    -- TPI/FIB Frogger (frogger2)
    [1949211328] = {
        offset = vector3(-1.0, 3.02, -1.1),
        labels = { -- Liveries
            [0] = "FEDERAL INVESTIGATION BUREAU",
            [1] = "TREVOR PHILIPS ENTERPRISES"
        }
    },
    -- Annihilator/Patriotism and Immigration Authority (annihilator)
    [837858166] = {
        offset = vector3(-0.5, 4.0, -0.35),
        labels = { -- Liveries
            [0] = "NATIONAL OFFICE OF SECURITY ENFORCMENT"
        }
    },
    -- Valkyrie (valkyrie)
    [-1600252419] = {
        offset = vector3(0.0, 4.0, -1.15),
        labels = { -- Liveries
            [0] = "UNITED STATES ARMY"
        }
    },
    -- Avenger (avenger)
    [-2118308144] = {
        offset = vector3(0.0, 9.45, -2.45),
        labels = { -- Liveries
            [0] = "UNITED STATES MARINES"
        }
    },

    -- Example of custom helicopter:
    -- Emergency Maverick AS350 (eheli)
    -- [`eheli`] = {
    --     offset = vector3(0.0, 3.0, -1.15),
    --     labels = { -- Liveries
    --         [0] = "LOS SANTOS POLICE DEPARTMENT",
    --         [1] = "SAN ANDREAS HIGHWAY PATROL",
    --         [2] = "BLAIN COUNTY SHERIFF OFFICE",
    --         [3] = "SAN ANDREAS FIRE DEPARTMENT"
    --     }
    -- },
    -- You can also do GetHashKey("eheli") instead of `eheli`
    -- Here is a guide if you need more help: https://madsl.gitbook.io/docs/resources/helicopter-camera/adding-custom-helicopters
}
Only logged in customers who have purchased this product may leave a review.
How to install resources
Installing mods on FiveM allows you to customize your server with unique assets, scripts, MLOs, and other enhancements. Here's a clear, detailed guide on how to install mods to your FiveM server.
Step 1: Download the Desired Mod
Find a Mod: Start by browsing through websites that offer FiveM mods, such as fivem-mods.net, GTA5-Mods.com, or community-based forums and Discord servers. You can also download mods from repositories like GitHub or from script developers' personal websites.
Check Compatibility: Ensure that the mod you're downloading is compatible with the version of FiveM you're running (especially if you're using specific frameworks like QBCore or ESX).
Download Files: Download the mod files, usually compressed in a
.zipor.rarfile format. These files will contain the necessary resources for installation.
Step 2: Prepare Your Server
Access Your Server Files: Log into your FiveM server’s file manager. This can be done either through an FTP client like FileZilla or through the control panel provided by your hosting provider.
Create a Backup: Before making any changes, it's essential to back up your server files. This ensures you can restore your server in case something goes wrong.
Locate the Resources Folder: Once inside your server files, locate the resources folder. This is where all mods and scripts are installed.
Step 3: Install the Mod
Extract the Files: If the mod is in a compressed file, extract the contents to a folder on your local computer.
Upload the Mod Files:
- Use your FTP client or file manager to upload the extracted folder into the resources folder of your server.
- Ensure the folder name is descriptive, as you will reference it in the server configuration.
Configure the Server to Load the Mod:
- Open your server’s server.cfg file (found in the main directory of your server).
- Add a line to ensure the server loads the mod. Typically, this will be in the form of:css
ensure [mod_name] - For example, if you added a mod called
my_car_mod, you would add:rubyensure my_car_mod
Step 4: Set Up Dependencies (If Any)
Some mods may have dependencies, such as specific libraries, frameworks, or resources that need to be installed separately. Always check the mod’s documentation for any such requirements.
Install Dependencies: If the mod requires any additional resources, download and install them in the same resources folder, following the same process outlined in Step 3.
Load Dependencies: Add any necessary dependencies to your
server.cfgfile just as you did for the main mod.
Step 5: Restart the Server
- Restart the Server: Once the mod and its dependencies have been uploaded and configured, restart your server.
- You can either use the Restart button in your control panel or manually restart it through an FTP client or terminal command.
- Check the Console: After the restart, monitor the server console for any error messages. If you see any issues related to the mod, check the mod’s documentation or troubleshoot based on the error message.
Step 6: Test the Mod In-Game
Join Your Server: Open FiveM and connect to your server to test the mod.
Check for Issues: Test whether the mod functions as expected. Ensure that the new features, vehicles, or scripts are loading properly.
Step 7: Troubleshoot (If Necessary)
If the mod isn't working as expected, you may need to troubleshoot:
- Check File Paths: Ensure all files are in the correct folders and paths.
- Review Logs: Look at the server logs for any errors or conflicts.
- Update Dependencies: Ensure any required dependencies are correctly installed and up to date.
- Mod Compatibility: Verify that the mod is compatible with the version of FiveM and other mods you’re using.
Final Thoughts
Installing mods on your FiveM server is a great way to enhance gameplay, offer unique content to players, and make your server stand out. Always remember to back up your server before making any changes, and be mindful of mod compatibility to prevent conflicts.
By following the steps outlined above, you can easily install and manage mods to enrich your FiveM server experience.
Mods that will extend Roleplay
- Money-Back Guarantee: If you're not satisfied, we've got you covered with a no-questions-asked refund policy.
- Exclusive Content: Our mods and scripts are professionally crafted and exclusive to our platform.
- Trusted by the Community: Join thousands of FiveM server owners who rely on us for quality resources.
- High-Quality Design: Built with optimized coding practices for top-tier performance.
- Seamless Integration: Easily install and run on any FiveM server without compatibility issues.
- Customizable Options: Adjust settings and features to fit your server's unique style.
- Optimized Performance: Tested to ensure minimal resource usage and maximum efficiency.
- Lifetime Updates: Stay ahead with ongoing updates and improvements included at no extra cost.
Reviews
There are no reviews yet.