
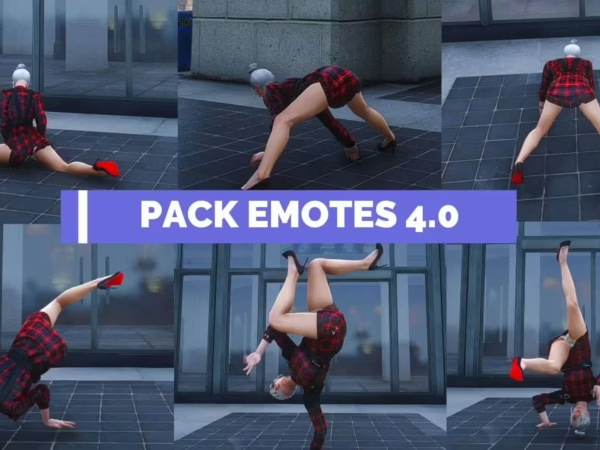
DP Emotes v4.0 (+ 1400 VIP Emotes)
$28.99 Ursprünglicher Preis war: $28.99$18.99Aktueller Preis ist: $18.99.
# Features
– Search Function 🔎
– Custom 1400+ Animations 🏃
– Further support for shared and couple poses / animations 👫
– Animal Emotes – Big dog and small dog. *More to come. Stay tuned!* 🐩
* Easily convert Menyoo to dpemotes 🔄
– Shared Dances 🕺💃
– Shared Particle Effects 💨
– QBCore Framework & Keybinding Support ⚙️
– Hide Adult Emotes 🔞
– Easy To Understand Configuration File ⚙️
-
$ USD
-
€ EUR
-
£ GBP
-
$ AUD
-
R$ BRL
-
CHF CHF
-
¥ JPY
-
 Instant Download
 -
Satisfaction Guarantee
-
100% Open Source
-
Works out-of-the-box
Video Preview
All languages were either translated using Google Translate or contributed by you, the community.
If you happen to find any incorrect translations or would like to add more languages, please feel free to provide an “issue” with the correct / additional translations.
Languages can be selected and/or added in config.lua.
———————————————————————————————————————————————————————–
# Features
– Search Function 🔎
– Custom Animations 🏃
– Further support for shared and couple poses / animations 👫
– Animal Emotes – Big dog and small dog. *More to come. Stay tuned!* 🐩
* Easily convert Menyoo to dpemotes 🔄
– Shared Dances 🕺💃
– Shared Particle Effects 💨
– QBCore Framework & Keybinding Support ⚙️
– Hide Adult Emotes 🔞
– Easy To Understand Configuration File ⚙️
————————————————————
# Menu Keybind 🎛️
**Important Note:**
The keybind uses RegisterKeyMapping. By default, the server owner configured keybind in the *initial* config.lua will be the default key, however once the keybind is set for a user, it’ll stay with this new value. Editing the config keybind will change it for new players only.
**Menu key:** F5
Server owners can change this in the `config.lua`.
Alternatively, the player base can set their own menu keybind to open DpEmotes
Esc > settings > keybinds > fivem > dpemotes
* More keybinds are now using key mappings which means that they are now available in your FiveM settings to change (`FavKeybind` and `RagdollKeybind`)
———————————————————————————————————————————————————————–
# Keybinds and SQL 🎛️
The original dpemotes uses mysql-async which was then changed to ghmattimysql. Unfortunately, they are no longer maintained.
To use the SQL features, install the [oxmysql](https://github.com/overextended/oxmysql) resource. If you do not want to use the SQL features, comment out the `oxmysql` region in fxmanifest.lua.
Alternatively, you can use the keybind command that comes with FiveM without having the SQL, by entering the following into F8:
`bind keyboard “Yourbutton” “e youremote”`. To remove the keybind, type `”unbind keyboard “Yourbutton”`.
————————————————-
# Ragdoll 🥴
* To enable ragdoll, change `RagdollEnabled = false,` to true in config.lua.
Much like the menu key, `RagdollKeybind` is also using RegisterKeyMapping. It is currently set to `U` by default *(server side)* however can be set to the player’s preferred keybind in the FiveM keybinds setting found in the settings menu within the Esc Menu.
* New setting: `RagdollAsToggle`, this will make either the ragdoll be a toggle or a hold key
———————————————————————————————————————————————————————————————————————————————————————————————————————————————-
# Adult Emotes 🔞
Adult Emotes can be hidden from the menu by setting `AdultEmotesDisabled` to `true` in the config.lua file.
This will completely conceal the emotes from the lists *(Emotes, Shared Emotes, etc)* at startup making them unusable.
The emotes that are concealed, are the ones flagged in the animation list with `AdultAnimation`. You can see how it is done with `fspose`.
——————————————————————————
# QBCore ⚙️
**QBCore integration to match their fork of the original dpemotes**
– Config option which supports the QB Framework in their fork of dpemotes
If you’re using qb-core, you can now set `Framework = “qb-core”` in the config file, otherwise leave it as `false`.
——————————————————————————
—————————————————————————————————————————————————–
# Installation Instructions ⚙️:
* add DpEmotes to your `server.cfg`
* Download the latest recommended artifacts [for Windows](https://runtime.fivem.net/artifacts/fivem/build_server_windows/master/) or [for Linux](https://runtime.fivem.net/artifacts/fivem/build_proot_linux/master/)
* [Enforce gamebuild to latest build](https://forum.cfx.re/t/tutorial-forcing-gamebuild-to-casino-cayo-perico-or-tuners-update/4784977) for all emotes and props to work correctly
* Set the desired language and settings in the config.lua
* Qb-Core server owners, set `Framework = ‘qb-core’` in the config file, otherwise leave it as false.
* start dpemotes
# Additional Instructions ⚙️
– [Please check the fivem forum thread](https://forum.fivem.net/t/dpemotes-356ish-emotes-usable-while-walking-props-and-more/843105)
– [Read my Menyoo To DpEmotes Tutorial](https://forum.cfx.re/t/how-to-menyoo-to-dpemotes-conversion-streaming-custom-add-on-props/4775018) for tips on how to attach props to the players, how to convert Menyoo to dpemotes and other tips you may need to know.
———————————————————————————————————————————————————————–
# Shared emotes 👩🏻❤️💋👨🏼
Emotes will work with either `SyncOffset` or `Attachto`.
– If it is with `SyncOffsetFront` or `SyncOffsetSide`, then the offset used is the one of the emote the player started.<br/>
For example, if player one starts the emote `handshake` which has `SyncOffsetFront`, then player one will have the `SyncOffsetFront` but not the other player.
– If it is with `Attachto`, then it’ll either be player one’s data used for attaching, or the player two’s data.<br/>
For example, if player one start the emote carry, then the other player will be attached but not the player one because Attachto is set in `carry2` and not `carry`.<br/>
– If player one starts the emote `carry2`, then player one will be attached and not the other player.
it’s the player who start the animation who will in most cases be moved
*Special case, if both emote have the `Attachto` then only the player who started the emote will be attached.*
You can find a list of ped bones to attach the other player here: [Ped Bones](https://wiki.rage.mp/index.php?title=Bones)
Using the website provided above, enter the bone ID, ie `1356` and not `111`, which is the Bone Index.
———————————————————————————————————————————————————————–
# Particle Effects 💨
Particle effects can be found using the [DurtyFree GTA V Dump](https://github.com/DurtyFree/gta-v-data-dumps/blob/master/particleEffectsCompact.json). You will need to add the particle assest, name, and placement. Placement is done via XYZ, Pitch, Roll, Yaw, and scale.
Big thanks to DurtyFree for his amazing work.
“`lua
PtfxPlacement = {
-0.15, — X
-0.35, — Y
0.0, — Z
0.0, — ROTATION X
90.0, — ROTATION Y
180.0, — ROTATION Z
1.0 — SCALE
},
“`
<img src=”screenshots/pfxcoords.png” width=”350″>
By default, the main prop will share it’s coordinates with the particle effect, so just put 0.0 for the particle effects and you will be good to go.
If no prop is uses in the animation or you require the particle effect to be in a different location, use `PtfxNoProp = true`, and 0.0 will 9/10 times be the human peds’ stomach; you can then offset your coordinates based on that with the first 3 entries being XYZ, and the last 3 being rotation XYZ.
Using Menyoo, spawn down a tennis ball and attach it to human, by default menyoo will attach it to the SKEL_ROOT bone (stomach), so from that, what we can do is offset the coordinates, say, up to the human ped’s mouth, and then once we’ve got it correct, we can transfer those coordinates over to dpemotes, and tah dah, we have our Ptfx Placement.
———————————————————————————————————————————————————————–
# Adding Your Own Animations ⚙️
Because the menu gets updated frequently, the files get overwritten. To avoid this, you can add your own / downloaded animation files `(.ycd)` inside of a newly created folder, give it a name, and place it in the `dpemotes\stream\[Custom Emotes]` folder.
Add your animation code to the `AnimationListCustom.lua` and make a backup of this file, call it `BackUpAnimationListCustom.lua`.
Whenever an update is released, rename `BackUpAnimationListCustom.lua` to `AnimationListCustom.lua`, click yes to overwrite, and you’re good to go.
Below is an example:
<img src=”screenshots/customanims.png” width=”550″>
———————————————————————————————————————————————————————–
# Add-Ons 🛠️
* Fixed an issue with the clipboard and added textures to paper (/e clipboard)
* Changed umbrella texture to black (/e umbrella)
Only logged in customers who have purchased this product may leave a review.
Slap Mods onto Your FiveM Server Like a Pro
Alright, listen up, you want to get those sweet mods onto your FiveM server, right?Tired of the same old boring server and want to spice things up with custom cars, scripts, or maps?Let's get this sorted.Installing mods on FiveM is how you level up your server from basic to banging.It's easier than you think, even if you're not a tech wizard.This guide will walk you through it step by step, no jargon, just straight-up instructions to get your server looking and playing exactly how you want.Step 1: Snag Your Mod - Find the Goodies
First things first, you need to find the mods you actually want.Think of it like going shopping, but for your server.- Hit up the usual spots: Websites like fivem-mods.net, GTA5-Mods.com are goldmines. Loads of creators post their work there.
- Community is key: Don't sleep on forums and Discord servers. You'll find hidden gems and get recommendations from other server owners.
- GitHub & Dev Sites: For more unique scripts, check out GitHub or the developers' own websites. Sometimes the best stuff is off the beaten path.
.zip or .rar file.Step 2: Server Prep - Get Ready to Rumble
Right, time to get into the server's guts. Don't panic, it's not brain surgery.- Access your server files: You'll need to log into your server's file manager. This is usually through an FTP client like FileZilla or your hosting provider's control panel.
- BACK IT UP, fam: Seriously, before you change anything, make a backup of your server files. If you mess something up (and we all do sometimes), you can just restore it and pretend it never happened.
- Find the 'resources' folder: This is your mod garage. It's where all the magic happens. Dig around in your server files and locate the
resourcesfolder.
Step 3: Mod Installation - Drop It In
Now for the main event - getting that mod live.- Extract the files: If your mod is zipped up, unzip it to a folder on your computer.
- Upload to the 'resources' folder: Use your FTP client or file manager to drag and drop (upload) the extracted mod folder into the
resourcesfolder on your server.- Folder name matters: Make sure the folder name is something you'll recognise later, you'll need it for server config.
- Tell your server to load the mod: This is the server.cfg bit.
- Open your
server.cfgfile. It’s in the main directory of your server. - Add a line like this:
ensure [mod_name] - Replace
[mod_name]with the actual name of your mod folder. - Example: If your mod folder is called
sick_drift_car, you'd addensure sick_drift_car.
- Open your
ensure [mod_name]
ensure my_car_mod
Step 4: Dependencies - The Extras You Might Need
Sometimes, mods are a bit needy and require extra bits and bobs to work. Dependencies, they're called.- Check the mod's info: The mod creator should tell you if there are any dependencies. Read the documentation!
- Install dependencies: If there are dependencies, download them and install them in the same
resourcesfolder, just like you did with the main mod in Step 3. - Load dependencies too: You'll also need to add
ensure [dependency_name]lines in yourserver.cfgfile for each dependency, above theensure [mod_name]line for your main mod.
Step 5: Server Restart - Fire It Up
Time to reboot and see if it all works.- Restart your server: Use the 'Restart' button in your control panel or restart it manually if you're old school.
- Watch the console: Keep an eye on your server console after restart. Any red text or error messages? If so, check the mod's docs or Google the error.
Step 6: In-Game Test - Does It Bang?
Get in the game and see if your mod is doing its thing.- Join your server: Fire up FiveM and connect to your server.
- Test it out: Does the mod work as expected? New car there? Script doing its job? Map looking fresh?
Step 7: Troubleshooting - When Things Go Wrong
Sometimes things don't go to plan. Don't sweat it, happens to the best of us.- Check file paths: Are your files in the right folders? Double-check everything.
- Review server logs: Server logs are your friend. They tell you if anything went wrong.
- Update dependencies: Are your dependencies up to date? Outdated ones can cause issues.
- Compatibility check again: Is the mod actually compatible with your FiveM version and other mods? Conflicts happen.
FAQs - Your Burning Questions Answered
- Q: Where do I find good FiveM mods?
- A: Websites like fivem-mods.net and GTA5-Mods.com are great starting points. Community forums and Discord servers are also goldmines.
- Q: What's 'server.cfg' and why do I need to mess with it?
- A:
server.cfgis your server's brain. It tells your server what to load and how to behave. You need to edit it to tell your server to load your new mods. - Q: What if the mod doesn't work after installing?
- A: Troubleshooting time! Check file paths, server logs, dependencies, and mod compatibility (as mentioned in Step 7). Google is your friend too!
- Q: Do I need to restart my whole server every time I install a mod?
- A: Yep, you do. Restarting the server makes it reload all the resources, including your newly installed mod.
- Q: Can mods break my server?
- A: Potentially, if they're poorly made or incompatible. Always download mods from trusted sources and back up your server before installing anything new.
Final Word - Mod Like a Boss
See? Installing mods on your FiveM server isn't rocket science.It's all about following the steps, being a bit careful, and not being afraid to experiment.Get out there, find some killer mods, and make your FiveM server the envy of everyone. Happy modding!Mods that will extend Roleplay
- Money-Back Guarantee: If you're not satisfied, we've got you covered with a no-questions-asked refund policy.
- Exclusive Content: Our mods and scripts are professionally crafted and exclusive to our platform.
- Trusted by the Community: Join thousands of FiveM server owners who rely on us for quality resources.
- High-Quality Design: Built with optimized coding practices for top-tier performance.
- Seamless Integration: Easily install and run on any FiveM server without compatibility issues.
- Customizable Options: Adjust settings and features to fit your server's unique style.
- Optimized Performance: Tested to ensure minimal resource usage and maximum efficiency.
- Lifetime Updates: Stay ahead with ongoing updates and improvements included at no extra cost.
2 reviews for DP Emotes v4.0 (+ 1400 VIP Emotes)
There are no reviews yet.