3 product images available.
Secure Checkout
Cards, Apple Pay, Google Pay, iDEAL/Wero, Bancontact, EPS, Przelewy24, and optional Crypto where available via Stripe.
Requires a FiveM server, ESX or QBCore, access to server resources, and permission to restart the resource after configuration.
Description
Video preview
https://streamable.com/1cdjx7 https://streamable.com/hxf9zhCHANGELOG
UPDATE v1.6:
- Fixed a CPU leak with my terribly optimized PolyZone script, thanks to FjamZoo.
- Your locations will be the same, you just need to move them around a bit in the locations.lua
- Added blip system to the locations
- Forgot about this one, but now available
- Simple naming system, if no blip name is provided it defaults to “Mechanic Shop”
- Included blip colour to help differenciate between locations
- Fixed some issues with custom garage scripts
- Add a built in callback that checks to see if the vehicle is owned or not
- This means it doesn’t need to touch any garage system and removes the qb-garage dependancy
UPDATE v1.5:
- Fixed a missing loop for the modelnames, this fixes a repairing error (thought I caught them all…)
- Fixed help info on /togglesound command
- Fixed the completely broken vehicle ownership system, some were broken, and some were missing.
- Every script has been altered to fix this adding a callback.
- Cosmetic items are only called once when the menu opens
- Performance items are called more than once for adding and removing
- This can disabled through the config.lua BUT still adds a dependancy of qb-garages. (or atleast the callback that is used)
- Added the ability to add mechanic shop locations for specific jobs
- There are several new config commands, these can change how the systems work drastically
- Toggles for when a location is required, if a job is required for that location or even if any player can customise things but HAVE to do it in a shop.
- It depends on what is enabled and disabled.
- New file locations.lua
- This is your physical job locations, instructions on how to use are in the file itself.
- Supports multiple job locations
- Supports not requiring a job for the mechanic shop location
- New file payments.lua and paymentservers.lua
- This is a new payment script, if you have a different system for payments, you won’t need this.
- Uses qb-input and repurposed events from qb-phone to create an invoice system for jobs
- Commission becomes possible with this system through slight edits of qb-phones config.
- Ticket system from my other scripts is an option, you only need to add one line to qb-phone’s client.lua
- Option to add till locations usable with qb-target.
- New /charge command
- This is essentially the bill command but usable by all people specified by Config.JobRoles
- This works the same as the till register system but is simply a command.
- If you don’t want to use qb-target register systems, this is a viable replacement
- This can easily be removed by commenting it out in paymentserver.lua
UPDATE v1.4:
- Fixed a bug, due to a weird FiveM native, when grabbing the model names it calls some incorrectly
- eg. landstalker2 is called as landstlkr2
- I’ve added loop events to correct this
- If you have issues and there are some vehicles I missed, then check repair.lua for the debugging info
- I’ve found imports don’t get their names correctly either, use the debug notification to find what it “thinks” it should be and add it to the config to correct it
- Changed how the items menu’s call on the names
- this goes along with the bug above but works as it is
- Added a workaround for the “vehicleStatus” being nil issues
- If the info can’t be found it forces a new setup of vehicleStatus
- Until I can work out a better way, it forces the setup, alerts the mechanic then halts the command.
- This makes it so sometimes you need to use the mechanic tools twice, but it alerts the user about it.
- Repair costs are now based on vehicle damage with the config values being their max
- For Example: If the engine repair cost is set to 10 and the engine is 40% damaged, it will cost 4 of the chosen material
- These are still ignored if you set free repairs in the config
UPDATE v1.3
- Added Support for multiple job roles
- “Config.JobRole” dictates what jobs will be allowed to use the items if “Config.RequiresJob = true”, otherwise it will ignore the job requirement code
- Removed some unnecessary job requirement calls, these were hidden behind a job required menu
- Attempted to make your character face the vehicle, so you don’t end up changing an engine while facing away from the car.
- Thank the cats from the CatCafe for teaching me how to implement this.
- Removed the double + incorrectly worded notifications when using items that would be removed or added from inventory
- Fixed % numbers for extra parts on the vehicle
- Un-comment out the exports from qb-vehiclefailure to enable damage to these parts
- Make sure they match the name of the script used for your default mechanic’s job (qb-mechanicjob)
UPDATE v1.2
- Fixed non-mechanic menus notifying “only a mechanic can use this” when closing the menu.
- Updated all commands to use QBCores built-in command function so they now show descriptions.
- Changed /vehicledamage to /checkdamage so its matches /checkmods
- Fixed cars without mods already installed showing 0 possible mods
- This has made changes to most files in this script, if a command/item needs to fetch mods its been edited to for this fix
- Added Duct Tape item, these repair the chosen amount to the body and engine and will only repair to a max of what you decide (this is intended as an alternate to repairkits)
- To install copy and paste the folder, add the new ducttape item to the shared (provided in the shared.lua) and add the bodyrepair.png image to your qb-inventory
- This item is highly customisable, wether to set it to a one time temporary repair, if it needs to be used multiple times, if it is consumed on use.
UPDATE v1.1:
- Added Support for qb-mechanicjob’s drivingdistance.lua It now handles the extra parts such as Fuel Tank and Clutch
- Optimized code slightly
Related Products You Might Like
- QBCore Framework Server - Complete QBCore foundation for your FiveM server
- Mechanic Job like NFS - Alternative mechanic system with NFS-style features
- Core Multiple Jobs - Allow players to have multiple jobs simultaneously
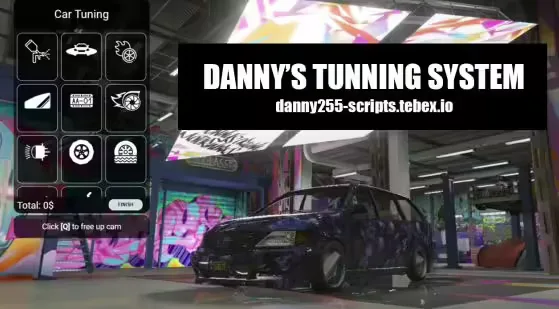
- Tuning System - Vehicle modification system perfect for mechanic roleplay
Installation notes
Buy this when it saves setup time
Use this checklist to decide quickly whether the resource fits your current server build, framework, and support expectations.
Server-owner payoff
Mechanic Job (QBCore) is positioned to reduce Mechanic Scripts instead of making you rebuild the same system from scratch.
Compatibility
Works with qbcore, qbox. Check the requirements block before adding it to a live stack.
Purchase confidence
Instant download, Stripe checkout, support access, and refund policy context are shown before payment.
Decision assets
Requirements, Preview video, Product Q&A
Product fit, setup, and proof at a glance
Use the published facts on this page to confirm whether Mechanic Job (QBCore) matches your server before checkout.
Compatibility
- Frameworks
- QBCore, QBOX
- Category
- Mechanic Scripts
Setup & requirements
- Install flow
- Download → resources folder → ensure in server.cfg
- Requirements
- Published on this page
- File size
- 876.98 KB
Proof & buyer questions
- Reviews
- No reviews yet
- Answered Q&A
- Ask before buying
Only the facts published on this page should be treated as confirmed. If you need more detail, review the description, requirements, changelog, reviews, and product Q&A before checkout.