

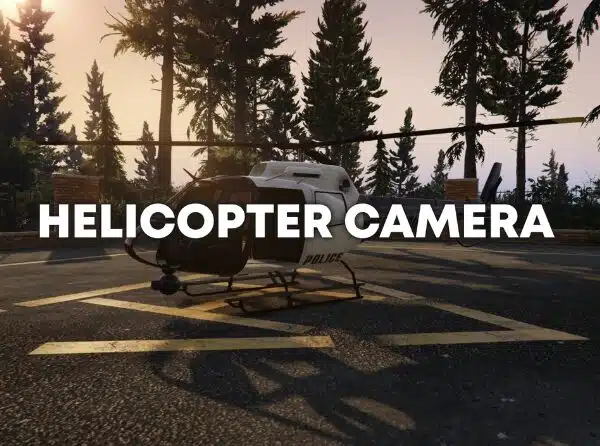
Caméra d'hélicoptère
$17.00 Le prix initial était : $17.00.$13.00Le prix actuel est : $13.00.
Enhance your helicopter gameplay with the Helicopter Camera resource! This standalone script adds a realistic helicopter camera system, complete with a modern, real-world-inspired UI. Features include:
- Toggleable camera with smooth movement
- Zoom functionality
- Target locking (vehicles, peds, ground)
- Adjustable Spotlight (brightness & radius)
- Vision Cycling (thermal/night vision)
- Marker Placement/Removal
- Rappel System
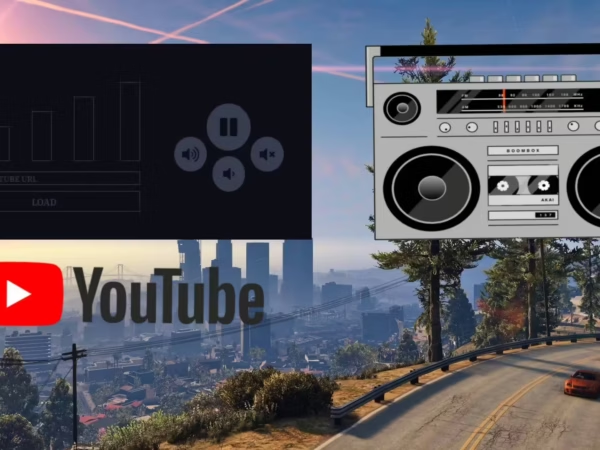
Keybinds are customizable via keymapping (default keybinds included). The script is highly configurable and open for editing. It also disables police scanners and flight music by default.
-
$ USD
-
€ EUR
-
£ GBP
-
$ AUD
-
R$ BRL
-
 Téléchargement instantané
-
Garantie de satisfaction
-
100% Open Source
-
Fonctionne immédiatement
Fichier de configuration:
Config = {}

Config.TimeFormat = 0 -- 0 = ZULU (UTC), 1 = In Game Time, 2 = OS TIME (Local Time)
Config.DateFormat = 1 -- 0 = MM/DD/YY, 1 = DD/MM/YY, 2 = YY/MM/DD, 3 = DD-Mon-YYYY

Config.PlaySounds = true
Config.PlayCameraMovementSounds = true -- If true, sounds will be played when you move the helicopter camera
Config.DisablePoliceScanner = true -- If true, disables the police radio/scanner/dispatch sounds.
Config.DisableFlightMusic = true -- If true, the ambiant flight music will be disabled.

Config.CameraTransition = true -- If true, the camera will ease when you enter/exit the camera
Config.CameraTransitionTime = 1000 -- The time the transition/ease will take.

Config.CameraTimecycle = false -- false or "string" ("Broken_camera_fuzz", "CAMERA_BW", "CAMERA_secuirity", "secret_camera" or any valid timecycle: https://wiki.rage.mp/index.php?title=Timecycle_Modifiers)
Config.CameraTimecycleStrength = 0.5 -- 0.0 to 1.0, the strngth of the camera timecycle, only used if Config.CameraTimecycle is set to a string.

Config.ShowLatitudeLongitude = false -- If set to true, it shows latitude/longitude, otherwise it shows the street and area
Config.TargetMaxReach = 424.0 -- The longest distance we can target an entity (424 is the regular culling dist for a player, you won't ever be able to practically reach this long anyway)

Config.ForceCameraLabel = false -- false or "Label"
Config.CanUseAnyHelicopter = false -- If true, any helicopter can be used, if false, only helicopters in the Config.Helicopters table are allowed.

Config.AllowCameraLock = true -- If true, the camera can lock onto the ground/targets
Config.InstantCameraLock = false -- If true, the camera will immediately lock on to the target instead of requiering a grace period
Config.AllowCameraLockOnGround = true -- If true, the camera can lock onto the ground/buildings etc.
Config.CameraLockBreakTicks = 3 -- The maximum amount of ticks the camera can lose visual of the point/person/vehicle before it breaks.
-- If true, when locking onto an entity it will lock to the center of it, if false the camera locks onto the part of the entity you were aiming at right before locking.
Config.LockOntoCenter = {
    Peds = true, -- It has a tendency to not work perfectly when this is false.
    Vehicles = false
}

Config.ShowLicensePlate = true -- (LPL)
Config.CheckLicensePlateAngle = true -- If true, it checks the angle between the helicopter camera and the plate. This reasults in player beeing unable to get a license plate read when the camera can't clearly see the plate.
Config.OnlyShowPlateIfLocked = false -- If true, the plate will only be showed if we have a lock on the vehicle.

Config.WhitelistedJobs = false -- If false, the script doesn't check for jobs. If you want to check for jobs add a table where the job is the key, and the value is the job level like so: Config.WhitelistedJobs = { ['police'] = 2, ['ambulance'] = 5 }
Config.ShowMessageIfWrongJob = true -- If true, it will display an error message of you attempt to enter the camer without the right job, if false no message, just won't allow you to enter

-- false = Anyone can use the camera (including the pilot), 1 = Any passanger (not pilot) can use the camera, 2 = Only rear passangers can use the camera
Config.PassengerOnly = false

Config.ShowPostalCodes = false -- Shows postals while in the camera (This is a little resource heavy)
Config.PostalResource = "nearest-postal" -- The resource the postal file is located in (resource must be loaded before helicam, and the files must be formated like nearest-postal)
Config.PostalFile = "new-postals.json" -- MUST be a JSON file! (Note: The file must be loaded inside the fxmanifest of Config.PostalResource for the helicam script to be able to read it)

-- Adds a audio sumbix while in a helicopter/plane (noise suppression) (NOTE: Get's applied to all helicopters/planes, not just the ones with a camera)
Config.UseSubmix = true
Config.NoSubmixInCamera = false -- Only applys if Config.UseSubmix is set to true, if true, this will stop the submix when you are using the camera

-- If true, players will be able to rappel from helicopters that support it.
Config.AllowRappeling = true

-- If the script should add chat suggestions for some of the chat commands.
Config.AddChatSuggestions = true

-- Spotlight
Config.AllowSpotlight = true
Config.MaxAmountOfSpotlights = false -- false or number, set's the maximum amount of spotlights that are allowed on the server at any given time (global limit)
Config.Spotlight = {
    Colour = { R = 255, G = 255, B = 255 }, -- The RGB colour values of the spotlight, you can for example make it slightly more blue like so: { R = 220, G = 220, B = 255 }
    MaxDistance = 600.0,                    -- The maximum distance the spotlight will glow
    DefaultBrightness = 5.0,                -- The defult brightness of the spotlight
    MinBrightness = 0.5,                    -- The minimum brightness of the spotlight
    MaxBrightness = 20.0,                   -- The maximum brightness of the spotlight
    BrightnessIncrements = 0.75,            -- How much to change the brightness of the spotlight when adjusting it
    Roundness = 2.0,                        -- The "roundness" of the spotlight
    DefaultRadius = 10.0,                   -- The defult radius/size of the spotlight
    MinRadius = 5.0,                        -- The minimum radius of the spotlight
    MaxRadius = 15.0,                       -- The maximum radius of the spotlight
    RadiusIncrements = 0.75,                -- How much to change the radius of the spotlight when adjusting it
    Falloff = 200.0,                        --
}

Config.HideMinimap = false
Config.ZoomBarOffset = 20 -- The offset in % from the bottom of the screen the zoom bar will be when the minimap is enabled. (If you have something on the top of your minimap then setting it to 25 usally works well)
Config.TargetBlip = {
    Display = true,
    Sprite = 390,
    Colour = 40
}

Config.AllowNightVision = true
Config.AllowNightVisionDuringDay = false -- If the night vision can be enabeld during the day or not.
Config.AllowThermal = true
Config.ThermalOptions = {
    MaxThickness = 1.0, -- 1.0 = Default GTA, can't see trough much at all. 20.0 = Able to see trough most thin walls, however won't be able to see trough the ground or multiple/thick walls.
    MinNoise = 0.0, -- The minimum amount of background noise
    MaxNoise = 0.1, -- The maximum amount of background noise
    FadeStart = 5000.0, -- How far away (meters) before the "background" fade starts
    FadeEnd = 6000.0 -- How far away (meters) before the "background" fade becomes solid
}

Config.AllowMarkers = true
Config.Marker = {
    MaxAmount = 9, -- Above 9 the number markers should be disabled.
    MaxDrawDistance = 1000.0, -- The furthest distance a marker will be drawn at.
    Circle = {
        Type = 23,
        Scale = 8.0,
        Colour = { R = 230, G = 50, B = 50, A = 200 } -- { R = 110, G = 160, B = 230, A = 200 }
    },
    Number = {
        Display = true, -- Set this to false if you want the max amount of markers the be above 9
        Scale = 6.0,
        Colour = { R = 230, G = 50, B = 50, A = 200 }
    },
    Blip = {
        Display = true, -- Whether to display marker blips
        Number = true, -- Whether to display the number on the blip or not (99 is cap.)
        Sprite = 57,
        Scale = 0.75,
        Colour = 1, -- Red
    }
}

Config.UseAnimProp = true -- If true, players will have a tablet in their hands while using the camera
Config.Tablet = {
    model = -1585232418, -- prop_cs_tablet
    anim = {
        dict = "amb@world_human_seat_wall_tablet@female@base",
        name = "base"
    },
    bone = 57005, -- SKEL_R_Hand
    offset = vector3(0.17, 0.10, -0.13),
    rotation = vector3(20.0, 180.0, 180.0)
}

Config.ShowInstructions = false -- If true, instructions will be showns while you are in the camera
-- Used this website to get the controls (~INPUT_5D25DCCD~ for example): http://tools.povers.fr/hashgenerator/
-- 0 = On the right, 3+ = on the left.
Config.InstructionButtons = {
    -- [0] = { control = "~INPUT_5D25DCCD~", label = "Adjust Spotlight Brightness (scroll +)" },
    -- [1] = { control = "~INPUT_F8C9FB3A~", label = "Adjust Spotlight Radius (scroll +)" },
    -- [2] = { control = "~INPUT_DB481F5~", label = "Lock Camera" }, -- This doesn't work for some reason...
    [0] = { control = "~INPUT_662F7BF5~", label = "Add/Remove Marker" },
    [1] = { control = "~INPUT_DB471A88~", label = "Cycle Vision" },
    [2] = { control = "~INPUT_51D50495~", label = "Spotlight" },
    [3] = { control = "~INPUT_5D25DCCD~", label = "Exit Camera" }
}

-- Speed Units:
-- KTS = Knots (nautical miles per hour)
-- MPH = Miles per hour
-- KMH = Kilometers per hour
-- MPS = Meters per second
-- FPS = Feet per second

-- Distance Units:
-- FT = Feet
-- M = Meters
-- MI = Miles
Config.Units = {
    Speed = "KMH", -- The speed of the helicopter                               (unit type: speed)
    Altitude = "M", -- The altitude of the helicopter                          (unit type: distance)
    TargetSpeed = "KMH", -- The speed of the target the camera is looking at    (unit type: speed)
    TargetElevation = "M", -- The elevation of where the camera is aming       (unit type: distance)
    TargetDistance = "M" -- The distance from the helicopter to the target      (unit type: distance)
}

Config.Camera = {
    MovementSpeed = {
        Keyboard = 3.0,
        Controller = 1.0
    },
    Zoom = {
        Max = 100.0,
        Min = 5.0,
        Speed = 5.0
    },
    RotationLimits = {
        Up = 25.0,
        Down = -89.5
    }
}

-- Docs: https://docs.fivem.net/docs/game-references/input-mapper-parameter-ids/ -- https://docs.fivem.net/docs/game-references/input-mapper-parameter-ids/keyboard/
Config.Keybinds = {
    ToggleCam = {
        Type = "KEYBOARD",
        Key = "E"
    },
    AttemptLock = {
        Type = "KEYBOARD",
        Key = "SPACE"
    },
    CycleVision = {
        Type = "MOUSE_BUTTON",
        Key = "MOUSE_RIGHT"
    },
    ToggleMarker = {
        Type = "MOUSE_BUTTON",
        Key = "MOUSE_MIDDLE"
    },
    Rappel = {
        Type = "KEYBOARD",
        Key = "X"
    },
    Spotlight = {
        Type = "KEYBOARD",
        Key = "G"
    },
    SpotlightBrightness = {
        Type = "KEYBOARD",
        Key = "LMENU"
    },
    SpotlightRadius = {
        Type = "KEYBOARD",
        Key = "LCONTROL"
    },
    Postals = {
        Type = "KEYBOARD",
        Key = ""
    }
}

Config.Localisation = {
    -- Notifications
    Notification = {
        JobNotWhitelisted = "You don't have the required job!",
        JobGrade = "Your job grade is to low!",
        NoCameraHeli = "This helicopter doesn't have a camera!",
        NoCameraPlane = "This plane doesn't have a camera!",
        IsPilot = "You can't use the camera while you are the pilot!",
        NotInRear = "You need to be in the rear of the helicopter to use the camera!",
        CameraInUse = "Someone else is already using the camera!",
        SpotlightInUse = "Someone else is already using the camera spotlight!",
        NoSpotlight = "This helicopter does not have a spotlight!",
        SpotlightGlobalLimit = "The global spotlight limit has been reached!",
        CannotRappelFromHeli = "This helicopter does not support rappeling!",
        CannotRappelFromSeat = "You cannot rappel from this seat!",
        ToHighToRappel = "The helicopter is to far up to rappel!",
        ConfirmRappel = "Are you sure you want to rappel? (Press again to confirm)",
        Rappeling = "Rappeling!"
    },
    -- Blip Names
    Blip = {
        Target = "Helicam Target",
        Marker = "Helicam Marker"
    },
    -- Keybinding Descriptions
    KeyMapping = {
        ToggleCam = "Helicam - Toggle Camera",
        AttemptLock = "Helicam - Attempt Lock",
        CycleVision = "Helicam - Cycle Vision",
        ToggleMarker = "Helicam - Add/Remove Markers",
        Rappel = "Helicam - Rappel From Helicopter",
        Spotlight = "Helicam - Toggle Spotlight",
        SpotlightBrightness = "Helicam - (+ scroll) Adjust Spotlight Brightness",
        SpotlightRadius = "Helicam - (+ scroll) Adjust Spotlight Radius",
        Postals = "Helicam - Toggle Postals"
    },
    ChatSuggestions = {
        ToggleCamera = "Enter/Exit the helicopter camera",
        Rappel = "Rappel from the helicopter"
    }
}

-- Nightvision/Thermal/Spotlight/PassengerOnly can be manually enabled/disabled for each model by adding one or more of following varabels under the model.
-- nightvision = false / true
-- thermalvision = false / true
-- spotlight = false / true
-- passengerOnly = false / 1 / 2 (see Config.PassengerOnly)
Config.Helicopters = {
    -- Default (if there is any missing data it will draw it's options from here)
    default = {
        offset = vector3(0.0, 0.0, -1.0),
        -- nightvision = true,   -- These are only needed/used if Config.AllowNightVision or Config.AllowThermal is set to false
        -- thermalvision = true, -- You can add these to each and every model, adding these and setting them to false disables the vision even if Config.AllowThermal etc. is set to true
        -- spotlight = true,     -- Allows yo overwrite Config.AllowSpotlight on a helicopter to helicopter basis.
        -- passengerOnly = false,
        labels = {
            [0] = "FLIR SYSTEMS"
        }
    },
    -- Police Maverick (polmav)
    [353883353] = {
        offset = vector3(0.0, 2.65, -1.0),
        labels = { -- Liveries
            [0] = "LOS SANTOS POLICE DEPARTMENT", -- 0 is default
            [1] = "AIR AMBULANCE"
        }
    },
    -- Maverick (maverick)
    [-1660661558] = {
        offset = vector3(0.0, 3.45, -0.65)
    },
    -- Buzzard Attack Chopper (buzzard)
    [788747387] = {
        offset = vector3(0.0, 2.15, -0.35)
    },
    -- Buzzard (buzzard2)
    [745926877] = {
        offset = vector3(0.0, 2.15, -0.35)
    },
    -- Frogger (frogger)
    [744705981] = {
        offset = vector3(-1.0, 3.02, -1.1)
    },
    -- TPI/FIB Frogger (frogger2)
    [1949211328] = {
        offset = vector3(-1.0, 3.02, -1.1),
        labels = { -- Liveries
            [0] = "FEDERAL INVESTIGATION BUREAU",
            [1] = "TREVOR PHILIPS ENTERPRISES"
        }
    },
    -- Annihilator/Patriotism and Immigration Authority (annihilator)
    [837858166] = {
        offset = vector3(-0.5, 4.0, -0.35),
        labels = { -- Liveries
            [0] = "NATIONAL OFFICE OF SECURITY ENFORCMENT"
        }
    },
    -- Valkyrie (valkyrie)
    [-1600252419] = {
        offset = vector3(0.0, 4.0, -1.15),
        labels = { -- Liveries
            [0] = "UNITED STATES ARMY"
        }
    },
    -- Avenger (avenger)
    [-2118308144] = {
        offset = vector3(0.0, 9.45, -2.45),
        labels = { -- Liveries
            [0] = "UNITED STATES MARINES"
        }
    },

    -- Example of custom helicopter:
    -- Emergency Maverick AS350 (eheli)
    -- [`eheli`] = {
    --     offset = vector3(0.0, 3.0, -1.15),
    --     labels = { -- Liveries
    --         [0] = "LOS SANTOS POLICE DEPARTMENT",
    --         [1] = "SAN ANDREAS HIGHWAY PATROL",
    --         [2] = "BLAIN COUNTY SHERIFF OFFICE",
    --         [3] = "SAN ANDREAS FIRE DEPARTMENT"
    --     }
    -- },
    -- You can also do GetHashKey("eheli") instead of `eheli`
    -- Here is a guide if you need more help: https://madsl.gitbook.io/docs/resources/helicopter-camera/adding-custom-helicopters
}
Seuls les clients connectés ayant acheté ce produit ont la possibilité de laisser un avis.
Comment installer des ressources
L'installation de mods sur FiveM vous permet de personnaliser votre serveur avec des ressources, des scripts, des MLO et d'autres améliorations uniques. Voici un guide clair et détaillé sur la façon d'installer des mods sur votre serveur FiveM.
Étape 1 : Téléchargez le mod souhaité
Trouver un modérateur: Commencez par parcourir les sites Web qui proposent des mods FiveM, tels que fivem-mods.net, GTA5-Mods.com, ou des forums communautaires et des serveurs Discord. Vous pouvez également télécharger des mods à partir de référentiels tels que GitHub ou à partir des sites Web personnels des développeurs de scripts.
Vérifier la compatibilité: Assurez-vous que le mod que vous téléchargez est compatible avec la version de FiveM que vous utilisez (surtout si vous utilisez des frameworks spécifiques comme QBCore ou ESX).
Télécharger les fichiers: Téléchargez les fichiers mod, généralement compressés dans un
.fermeture éclairou.rarformat de fichier. Ces fichiers contiendront les ressources nécessaires à l'installation.
Étape 2 : Préparez votre serveur
Accéder aux fichiers de votre serveur: Connectez-vous au gestionnaire de fichiers de votre serveur FiveM. Cela peut être fait soit via un client FTP comme FileZilla, soit via le panneau de contrôle fourni par votre hébergeur.
Créer une sauvegarde:Avant d'effectuer des modifications, il est essentiel de sauvegarder les fichiers de votre serveur. Cela vous permet de restaurer votre serveur en cas de problème.
Localisez le dossier Ressources:Une fois dans les fichiers de votre serveur, localisez le ressources dossier. C'est ici que tous les mods et scripts sont installés.
Étape 3 : Installer le module
Extraire les fichiers: Si le mod est dans un fichier compressé, extrayez le contenu dans un dossier sur votre ordinateur local.
Téléchargez les fichiers du mod:
- Utilisez votre client FTP ou votre gestionnaire de fichiers pour télécharger le dossier extrait dans le ressources dossier de votre serveur.
- Assurez-vous que le nom du dossier est descriptif, car vous y ferez référence dans la configuration du serveur.
Configurer le serveur pour charger le mod:
- Ouvrez votre serveur serveur.cfg fichier (trouvé dans le répertoire principal de votre serveur).
- Ajoutez une ligne pour garantir que le serveur charge le mod. En général, cela se présentera sous la forme suivante :css
assurer [nom_mod] - Par exemple, si vous avez ajouté un mod appelé
mon_mod_voiture, vous ajouteriez :rubisassurer mon_mod_voiture
Étape 4 : Configurer les dépendances (le cas échéant)
Certains mods peuvent avoir des dépendances, telles que des bibliothèques, des frameworks ou des ressources spécifiques qui doivent être installées séparément. Vérifiez toujours la documentation du mod pour connaître ces exigences.
Installer les dépendances: Si le mod nécessite des ressources supplémentaires, téléchargez-les et installez-les de la même manière ressources dossier, en suivant le même processus décrit à l’étape 3.
Charger les dépendances: Ajoutez toutes les dépendances nécessaires à votre
serveur.cfgfichier comme vous l'avez fait pour le mod principal.
Étape 5 : Redémarrer le serveur
- Redémarrer le serveur:Une fois le mod et ses dépendances téléchargés et configurés, redémarrez votre serveur.
- Vous pouvez soit utiliser le Redémarrage bouton dans votre panneau de contrôle ou redémarrez-le manuellement via un client FTP ou une commande de terminal.
- Vérifiez la console:Après le redémarrage, surveillez la console du serveur pour détecter d'éventuels messages d'erreur. Si vous constatez des problèmes liés au mod, consultez la documentation du mod ou effectuez un dépannage en fonction du message d'erreur.
Étape 6 : tester le mod dans le jeu
Rejoignez votre serveur:Ouvrez FiveM et connectez-vous à votre serveur pour tester le mod.
Rechercher des problèmes: Testez si le mod fonctionne comme prévu. Assurez-vous que les nouvelles fonctionnalités, les nouveaux véhicules ou les nouveaux scripts se chargent correctement.
Étape 7 : Dépannage (si nécessaire)
Si le mod ne fonctionne pas comme prévu, vous devrez peut-être résoudre le problème :
- Vérifier les chemins de fichiers: Assurez-vous que tous les fichiers se trouvent dans les bons dossiers et chemins.
- Journaux de révision:Consultez les journaux du serveur pour détecter d'éventuelles erreurs ou conflits.
- Mettre à jour les dépendances: Assurez-vous que toutes les dépendances requises sont correctement installées et à jour.
- Compatibilité des modules: Vérifiez que le mod est compatible avec la version de FiveM et les autres mods que vous utilisez.
Réflexions finales
L'installation de mods sur votre serveur FiveM est un excellent moyen d'améliorer le gameplay, d'offrir un contenu unique aux joueurs et de faire en sorte que votre serveur se démarque. N'oubliez pas de toujours sauvegarder votre serveur avant d'effectuer des modifications et veillez à la compatibilité des mods pour éviter les conflits.
En suivant les étapes décrites ci-dessus, vous pouvez facilement installer et gérer des mods pour enrichir votre expérience de serveur FiveM.
Des mods qui étendront le jeu de rôle
- Garantie de remboursement:Si vous n'êtes pas satisfait, nous vous proposons une politique de remboursement sans poser de questions.
- Contenu exclusif:Nos mods et scripts sont conçus de manière professionnelle et exclusifs à notre plateforme.
- Approuvé par la communauté:Rejoignez des milliers de propriétaires de serveurs FiveM qui comptent sur nous pour des ressources de qualité.
- Conception de haute qualité:Construit avec des pratiques de codage optimisées pour des performances de premier ordre.
- Intégration transparente:Installez et exécutez facilement sur n'importe quel serveur FiveM sans problèmes de compatibilité.
- Options personnalisables: Ajustez les paramètres et les fonctionnalités pour les adapter au style unique de votre serveur.
- Performances optimisées:Testé pour garantir une utilisation minimale des ressources et une efficacité maximale.
- Mises à jour à vie:Gardez une longueur d'avance grâce aux mises à jour et améliorations continues incluses sans frais supplémentaires.
Avis
Il n’y a pas encore d’avis.