Guia: Permitindo movimento enquanto algemado (FiveM)

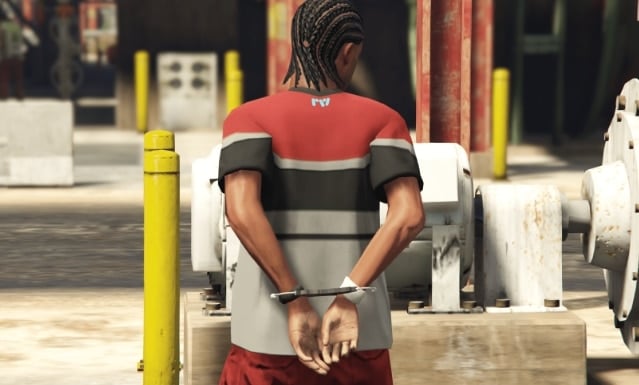
Handcuffing players is a critical feature in role-play scenarios for both QBCore and ESX Police Job frameworks in FiveM. Sometimes, you may want to allow players to move while handcuffed while restricting specific controls to maintain realism. This guide explains how to achieve this for both QBCore e ESX.
Just a heads up: We updated this tutorial in November 2024.
Go To Content

For QBCore Framework (& QBOX)
Step 1: Locate the Handcuffing Code
Em QBCore, handcuffing is typically handled in the police job script or a separate utility script for player interactions. Locate the relevant code for handcuffing, which often looks like this:
TaskPlayAnim(playerPed, 'mp_arresting', 'idle', 8.0, -8, -1, 49, 0, 0, 0, 0)
SetEnableHandcuffs(playerPed, true)
FreezeEntityPosition(playerPed, true)
Step 2: Enable Movement When Handcuffed
Modify the line that freezes the player’s position:
Antes:
luaCode kopierenFreezeEntityPosition(playerPed, true)
Depois:
FreezeEntityPosition(playerPed, false)
This change allows the player to move while handcuffed. Your updated code should now look like this:
TaskPlayAnim(playerPed, 'mp_arresting', 'idle', 8.0, -8, -1, 49, 0, 0, 0, 0)
SetEnableHandcuffs(playerPed, true)
FreezeEntityPosition(playerPed, false)
Step 3: Restrict Specific Actions
To restrict specific actions like attacking or shooting, add the following code:
Cidadão.CreateThread(função()
    enquanto verdadeiro faça
        Citizen.Wait(10)
        if IsHandcuffed then
            DisableControlAction(0, 24, true)  -- Attack
            DisableControlAction(0, 25, true)  -- Aim
            DisableControlAction(0, 142, true) -- MeleeAttackAlternate
            DisableControlAction(0, 75, true)  -- Leave Vehicle
            DisableControlAction(0, 92, true)  -- Shoot in vehicle
        fim
    fim
fim)
Substituir IsHandcuffed with the appropriate variable or function used in your script to check if the player is handcuffed.

Para ESX Framework
Step 1: Locate the Handcuffing Code
Em ESX, handcuffing behavior is typically defined in esx_policejob/client/main.lua. Look for code similar to the following:
luaCode kopierenTaskPlayAnim(playerPed, 'mp_arresting', 'idle', 8.0, -8, -1, 49, 0, 0, 0, 0)
SetEnableHandcuffs(playerPed, true)
SetPedCanPlayGestureAnims(playerPed, false)
FreezeEntityPosition(playerPed, true)
Step 2: Enable Movement When Handcuffed
Modificar o FreezeEntityPosition function:
Antes:
FreezeEntityPosition(playerPed, true)
Depois:
FreezeEntityPosition(playerPed, false)
The modified code should now look like this:
TaskPlayAnim(playerPed, 'mp_arresting', 'idle', 8.0, -8, -1, 49, 0, 0, 0, 0)
SetEnableHandcuffs(playerPed, true)
SetPedCanPlayGestureAnims(playerPed, false)
FreezeEntityPosition(playerPed, false)
Step 3: Restrict Specific Actions
Add the following thread to restrict actions while handcuffed:
luaCode kopierenCitizen.CreateThread(function()
    while true do
        Citizen.Wait(10)
        if IsHandcuffed then
            DisableControlAction(0, 142, true) -- MeleeAttackAlternate
            DisableControlAction(0, 30, true)  -- MoveLeftRight
            DisableControlAction(0, 31, true)  -- MoveUpDown
            DisableControlAction(0, 24, true)  -- Shoot
            DisableControlAction(0, 92, true)  -- Shoot in car
            DisableControlAction(0, 75, true)  -- Leave Vehicle
        end
    end
end)
Substituir IsHandcuffed with the corresponding variable or function used in your ESX script.
For vRP
Step 1: Locate the Handcuffing Code
Em vRP, handcuffing is usually managed in the vrp/modules/police.lua file or in a custom resource if your server has customized scripts. Look for code that controls player animations and behaviors when handcuffed.
The relevant part typically looks like this:
vRPclient.playAnim(player, {true, {{"mp_arresting", "idle"}}, true})
vRPclient.setHandcuffed(player, true)
vRPclient.setFreeze(player, true)
Step 2: Enable Movement While Handcuffed
To allow movement while handcuffed, modify the freezing behavior. Replace the following line:
Antes:
vRPclient.setFreeze(player, true)
Depois:
vRPclient.setFreeze(player, false)
The updated code should now look like this:
vRPclient.playAnim(player, {true, {{"mp_arresting", "idle"}}, true})
vRPclient.setHandcuffed(player, true)
vRPclient.setFreeze(player, false)
Step 3: Restrict Specific Actions
To maintain realism, you can disable certain controls while the player is handcuffed. Add a new client-side script or modify an existing one to include the following code:
Cidadão.CreateThread(função()
    enquanto verdadeiro faça
        Citizen.Wait(10)
        if IsHandcuffed then
            DisableControlAction(0, 24, true)  -- Attack
            DisableControlAction(0, 25, true)  -- Aim
            DisableControlAction(0, 142, true) -- MeleeAttackAlternate
            DisableControlAction(0, 75, true)  -- Leave Vehicle
            DisableControlAction(0, 92, true)  -- Shoot in vehicle
            DisableControlAction(0, 30, true)  -- Move Left/Right
            DisableControlAction(0, 31, true)  -- Move Up/Down
        fim
    fim
fim)
Linking the Handcuffed Status
In vRP, the IsHandcuffed variable needs to be linked to the player’s handcuffed status. Update your vRPclient script to synchronize the handcuff state. For example:
local IsHandcuffed = false

RegisterNetEvent('vrp:handcuff')
AddEventHandler('vrp:handcuff', function(status)
    IsHandcuffed = status
fim)
Trigger this event when a player is handcuffed or uncuffed in your server-side script.
Final Notes
- Ensure that you test the modified scripts on your server to verify they work as intended.
- Use proper variables and functions for checking if a player is handcuffed (
IsHandcuffedis a placeholder in this guide). - Tailor the
DisableControlActioncalls based on your server’s role-play needs. - This guide enhances immersion by allowing movement while keeping controls realistically limited.
By following this guide, you can enable movement for handcuffed players in both QBCore e ESX frameworks while maintaining control over their actions, leading to a more engaging role-playing experience.
