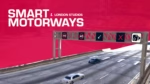
Video Önizlemesi
Özellikler
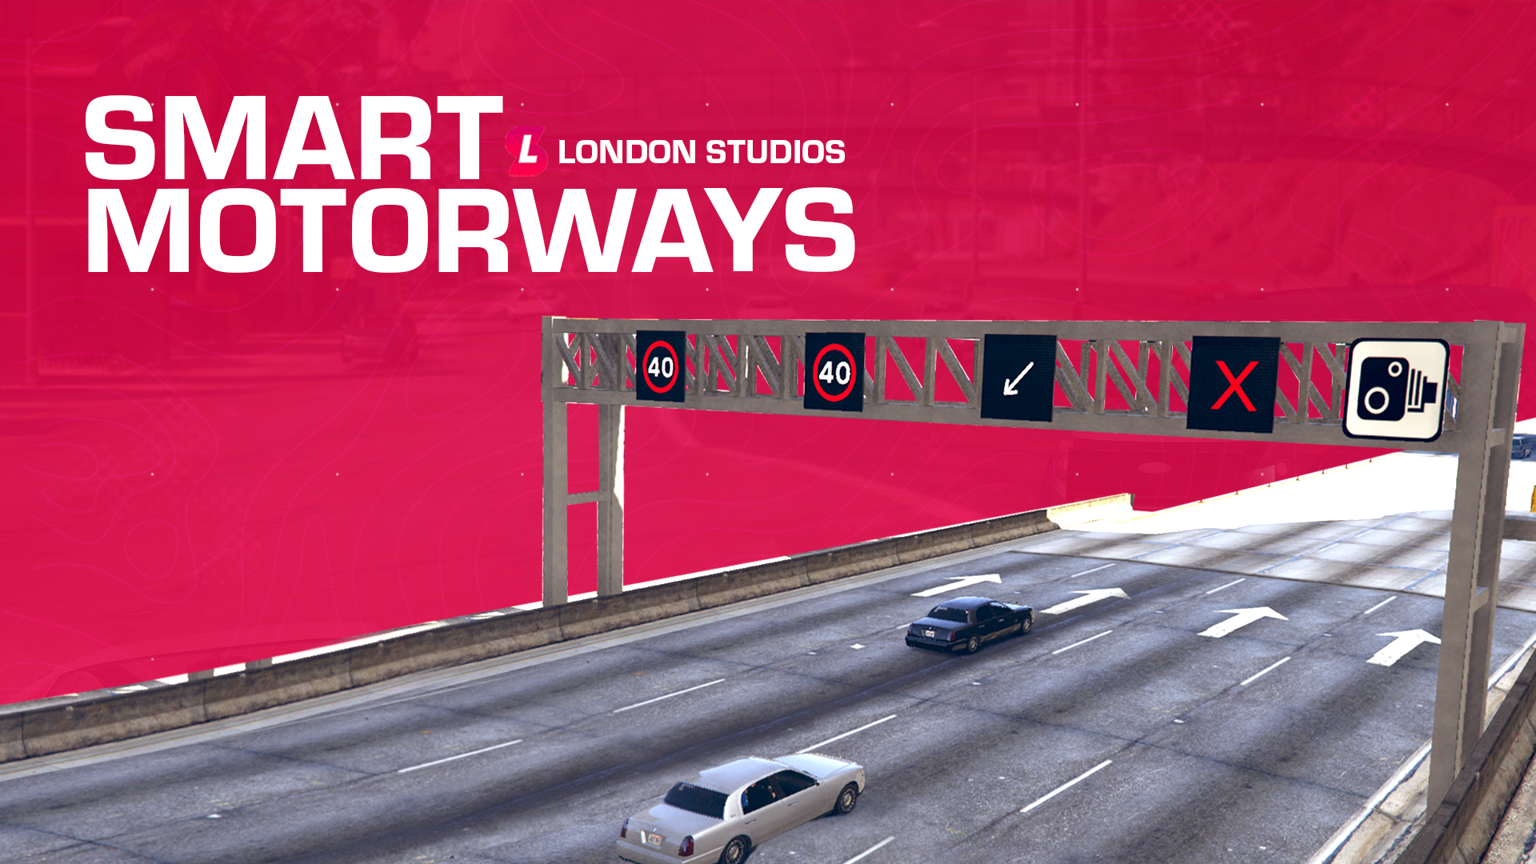
- Kontrol Paneli – Oyun içi kontrol panelimiz, oyuncularınızın şeritlerin üzerinde kullanılan simgeyi veya hızı gerçek zamanlı olarak kolayca ayarlamasını sağlar.
- Uzaktan Değişiklikler – Otoyol gantrileri, tek bir komut kullanılarak haritanın her yerinde güncellenebilir; bir harita ile düzenlemek istediğiniz konumu seçmenize olanak tanır.
- CCTV Sistemi – Kontrol panelinden haritanın her yerindeki gantrilerdeki CCTV kameralarını kolayca görüntüleyin ve taşıyın.
- ABD \/ BK \/ AB Modu – Akıllı Otoyollar, ABD, BK ve AB dahil olmak üzere üç modu destekler. Bu, sunucunuz için kutu içinden çıkan çok çeşitli farklı hızları desteklediğimiz anlamına gelir.
- Akıllı İşaretler Entegrasyonu – Akıllı Otoyollar, Akıllı İşaretler ile entegredir; yani her ikisinin de birer kopyasına sahipseniz, her gantrinin üzerine yeni bir panoya mesaj/simge ekleyebileceksiniz.
- Akıllı Hız Kameraları Entegrasyonu – Akıllı Otoyollar, Akıllı Hız Kameraları ile entegredir; yani her ikisinin de birer kopyasına sahipseniz, tüm gantrilerdeki kameralar aktif hale gelir ve her bir şeridin üzerinde belirlenen hız sınırına dinamik olarak uyum sağlayarak hız uygulamasına yardımcı olur.
- Simge Desteği – Hız desteğinin yanı sıra, sola ok ve şerit kapalı gibi simgelerimiz de bulunmaktadır.
- Discord Günlüğü – Kaynağımız, webhook'lar aracılığıyla Discord ile entegre olabilir. Bu, otoyol gantrilerindeki tüm değişiklikleri kaydedebilir ve gelecek için bir kayıt tutabilir.
- Ön Yapılandırılmış İşaretler – Haritada 60'tan fazla konumu önceden yapılandırdık, yani Akıllı Otoyollar kutusundan çıktığı gibi kullanıma hazırdır.
- Bellek Tasarrufu – Haritada Akıllı Otoyollara yapılan tüm değişiklikler bellekte kaydedilecektir, yani yeniden başlatmalardan sonra bile orada kalacaktır. /resetsmartmotorways komutumuzla tüm işaretleri kolayca temizleyebilirsiniz.
- Işıklı Dokular – Bu simgeler hem gündüz hem de gece parlaktır, bu da günün her saatinde sürücülerin dikkatini çekmelerini sağlar.
- Çoklu Şerit Desteği – İki, üç ve dört şeritli yolları destekliyoruz.
- Konumları Kolayca Ekleme – Geliştirici komutumuzla, oyun içinde kolayca yeni konumlar ekleyebilirsiniz; bunlar bir sonraki yeniden başlatma için otomatik olarak kaydedilir.
Yapılandırma
config = {

    -- We've included speed options for the UK, EU, and US based servers
    -- Simply type "UK", "EU", or "US" to change the speed options
    iconPack = "UK",

    -- If you add custom icons, you can add them here
    -- Speed-related icons will be used for speed cameras, and must contain the speed limit in the name as numbers only.
    -- E.g. an icon of speed_60 will be used for a speed limit of 60. An icon of 3_speed_40 would result in a speed limit of 340.
    -- Do NOT edit this section unless you know what you are doing and have modelled custom icons.
    iconPacks = {
        ["UK"] = {
            "arrow_left",
            "arrow_right",
            "red_x",
            "speed_20",
            "speed_30",
            "speed_40",
            "speed_50",
            "speed_60",
            "national_speed",
        },
        ["EU"] = {
            "arrow_left",
            "arrow_right",
            "red_x",
            "speed_20",
            "speed_30",
            "speed_40",
            "speed_50",
            "speed_60",
            "speed_70",
            "speed_80",
            "speed_90",
            "speed_100",
            "speed_110",
            "speed_120",
            "speed_130",
            "speed_140",
            "speed_150",
        },
        ["US"] = {
            "arrow_left",
            "arrow_right",
            "red_x",
            "bv_motorway_speed_15",
            "bv_motorway_speed_20",
            "bv_motorway_speed_25",
            "bv_motorway_speed_30",
            "bv_motorway_speed_35",
            "bv_motorway_speed_40",
            "bv_motorway_speed_45",
            "bv_motorway_speed_50",
            "bv_motorway_speed_55",
            "bv_motorway_speed_60",
            "bv_motorway_speed_65",
            "bv_motorway_speed_70",
            "bv_motorway_speed_75",
            "bv_motorway_speed_80",
            "bv_motorway_speed_85",
        },
    },


    cctvKeys = {
        up = {0, 172},
        down = {0, 173},
        left = {0, 174},
        right = {0, 175},
        leaveCam = {0, 200},
    },

    -- The distance in which the sign and its speed limits will load/unload at
    loadDistance = 200.0,

    -- This will enable debug printing on both the client and the server. This should be set to false most of the time.
    developerMode = false,

    integrations = {

        smartSpeedCameras = {
            enabled = false, -- Only enable if you have the Smart Speed Cameras resource installed and up to date
            resourceName = "SmartSpeedCameras", -- This is the name of the resource which Smart Speed Cameras is installed under
            cooldown = 60, -- This is the cooldown in seconds between speed camera detections. This is to prevent spam fines.
        },

        smartSigns = {
            enabled = false, -- Only enable if you have the Smart Signs resource installed and up to date
            resourceName = "SmartSigns", -- This is the name of the resource which Smart Signs is installed under
        }

    },

    saveSpeedsOnChange = true, -- If this is set to true, the speeds will be saved to locations.json when changed. If false, the speeds will reset on restart.
    saveTextOnChange = true, -- If this is set to true, the text will be saved to locations.json when changed. If false, the text will reset on restart.
    saveIconOnChange = true, -- If this is set to true, the icon will be


    closeMenuButton = {0, 177},

    -- This allows you to enable Discord logging for the signs
    -- You must add your webhook in sv_utils.lua
    logging = {
        enabled = false,
        displayName = "Smart Motorways",
        colour = 31487,
        title = "**New Sign Log**",
        icon = "https://i.imgur.com/dcOQmpA.jpg",
        footerIcon = "https://i.imgur.com/n3n7JNW.png",
        dateFormat = "%d-%m-%Y %H:%M:%S", -- Day-Month-Year Hour-Minute-Second
    },

    resetSignsCommand = {
        enabled = true,
        commandName = "resetsmartmotorway",
        Permissions = {
                EnablePermissions = false, -- If set to false, all below job checks will be disabled, even if they are enabled in the config.lua
                AcePermissions = {
                    Permission = "update.motorway.sign",
                    Enabled = false,
                },

                ESX = {
                    Enabled = false,
                    CheckJob = {
                        Enabled = false, -- Enable this to use ESX job check
                        Jobs = {"police"} -- A user can have any of the following jobs, allowing you to add multiple
                    }
                },
                -- We've added vRP integration. All you need to do is enable it below. Then, configure if you wish to check for groups or permissions, or even both
                vRP = {
                    Enabled = false,
                    CheckGroup = {
                        Enabled = false, -- Enable this to use vRP group check
                        Groups = {"police"}, -- A user can have any of the following groups, meaning you can add different jobs
                    },
                    CheckPermission = {
                        Enabled = false, -- Enable this to use vRP permission check
                        Permissions = {"police"} -- A user can have any of the following permissions, allowing you to add multiple
                    },
                },
                -- We've added QBCore integration. All you need to do is enable it below. Then, configure if you wish to check for jobs or permissions, or even both
                QBCore = {
                    Enabled = false,
                    CheckJob = {
                        Enabled = false, -- Enable this to use QBCore job check
                        Jobs = {"police"}, -- A user can have any of the following jobs, meaning you can add different jobs
                    },
                    CheckPermission = {
                        Enabled = false, -- Enable this to use QBCore permission check
                        Permissions = {"police"}, -- A user can have any of the following permissions, allowing you to add multiple
                    },
                },
                -- We've added QBX integration. All you need to do is enable it below. Then, configure if you wish to check for jobs or permissions, or even both
                QBX = {
                    Enabled = false,
                    CheckJob = {
                        Enabled = false, -- Enable this to use QBX job check
                        Jobs = {"police"}, -- A user can have any of the following jobs, meaning you can add different jobs
                    }
                },
        },
    },

    selectSignCommand = {
        commandName = "selectsign",
        Permissions = {
                EnablePermissions = false, -- If set to false, all below job checks will be disabled, even if they are enabled in the config.lua
                AcePermissions = {
                    Permission = "update.motorway.sign",
                    Enabled = false,
                },

                ESX = {
                    Enabled = false,
                    CheckJob = {
                        Enabled = false, -- Enable this to use ESX job check
                        Jobs = {"police"} -- A user can have any of the following jobs, allowing you to add multiple
                    }
                },
                -- We've added vRP integration. All you need to do is enable it below. Then, configure if you wish to check for groups or permissions, or even both
                vRP = {
                    Enabled = false,
                    CheckGroup = {
                        Enabled = false, -- Enable this to use vRP group check
                        Groups = {"police"}, -- A user can have any of the following groups, meaning you can add different jobs
                    },
                    CheckPermission = {
                        Enabled = false, -- Enable this to use vRP permission check
                        Permissions = {"police"} -- A user can have any of the following permissions, allowing you to add multiple
                    },
                },
                -- We've added QBCore integration. All you need to do is enable it below. Then, configure if you wish to check for jobs or permissions, or even both
                QBCore = {
                    Enabled = false,
                    CheckJob = {
                        Enabled = false, -- Enable this to use QBCore job check
                        Jobs = {"police"}, -- A user can have any of the following jobs, meaning you can add different jobs
                    },
                    CheckPermission = {
                        Enabled = false, -- Enable this to use QBCore permission check
                        Permissions = {"police"}, -- A user can have any of the following permissions, allowing you to add multiple
                    },
                },
                -- We've added QBX integration. All you need to do is enable it below. Then, configure if you wish to check for jobs or permissions, or even both
                QBX = {
                    Enabled = false,
                    CheckJob = {
                        Enabled = false, -- Enable this to use QBX job check
                        Jobs = {"police"}, -- A user can have any of the following jobs, meaning you can add different jobs
                    }
                },
        },
    },

    directionColours = {
        ["north"] = 17,
        ["south"] = 18,
        ["east"] = 17,
        ["west"] = 18,
    },

    -- Here you can translate the resource into another language
    translations = {
        selectSignHelp = "Select a smart motorways sign",
        editingSign = "Now editing sign ID: ",
        hasBeenSetTo = " has been set to: ",
        speedLimitOfLane = "Speed limit of lane ",
        symbolOfLane = "Symbol of lane ",
        speedUnit = "mph",
        resetAll = "All lanes have been reset.",
        resetSignsHelp = "Reset all Smart Motorways",
    },

    -- We do not recommend editing below this section:
    -- The offsets which the signs are placed at in comparison to the sign
    spawnOffsets = {
        -- Offsets for two lane setups
        [2] = {
            [1] = {x = -3.9, y = -2.1, z = 3.65},
            [2] = {x = 1.61, y = -2.1, z = 3.65}
        },
        -- Offsets for three lane setups
        [3] = {
            [1] = {x = -6.04, y = -2.2, z = 3.65},
            [2] = {x = -0.925, y = -2.2, z = 3.65},
            [3] = {x = 3.82, y = -2.2, z = 3.65}
        },
        -- Offsets for four lane setups
        [4] = {
            [1] = {x = -9.7801, y = -2.2, z = 3.65},
            [2] = {x = -3.21, y = -2.2, z = 3.65},
            [3] = {x = 2.52, y = -2.1, z = 3.65},
            [4] = {x = 8.0501, y = -2.1, z = 3.65}
        }
    },

    -- Here you can define the various locations of the signs around the map.
    -- Here you can configure the sound effect which is played when a sign is successfully updated
    soundEffect = {
        enabled = true,
        name = "CONFIRM_BEEP",
        dict = "HUD_MINI_GAME_SOUNDSET",
    },

    gantryModels = {
        [2] = `2_lane`,
        [3] = `3_lane`,
        [4] = `4_lane`,
    },
}











![Smart Motorways [v2] - Resource Demonstration Video - [Standalone/QBCore/ESX/QBX/vRP]](https://i.ytimg.com/vi/0UCBJGTo94s/hqdefault.jpg)
![FiveM - Smart Motorways [Standalone/QBCore/vRP/ESX]](https://i.ytimg.com/vi/J9UuugTUcC4/hqdefault.jpg)